¶ Stripe Payment Setup Guide
Note: Before setting up Stripe, make sure your country and currency are defined in the Restaurant Setup > Main Information page.
To set up Stripe as your payment processor in Jetrik, please follow the steps below:
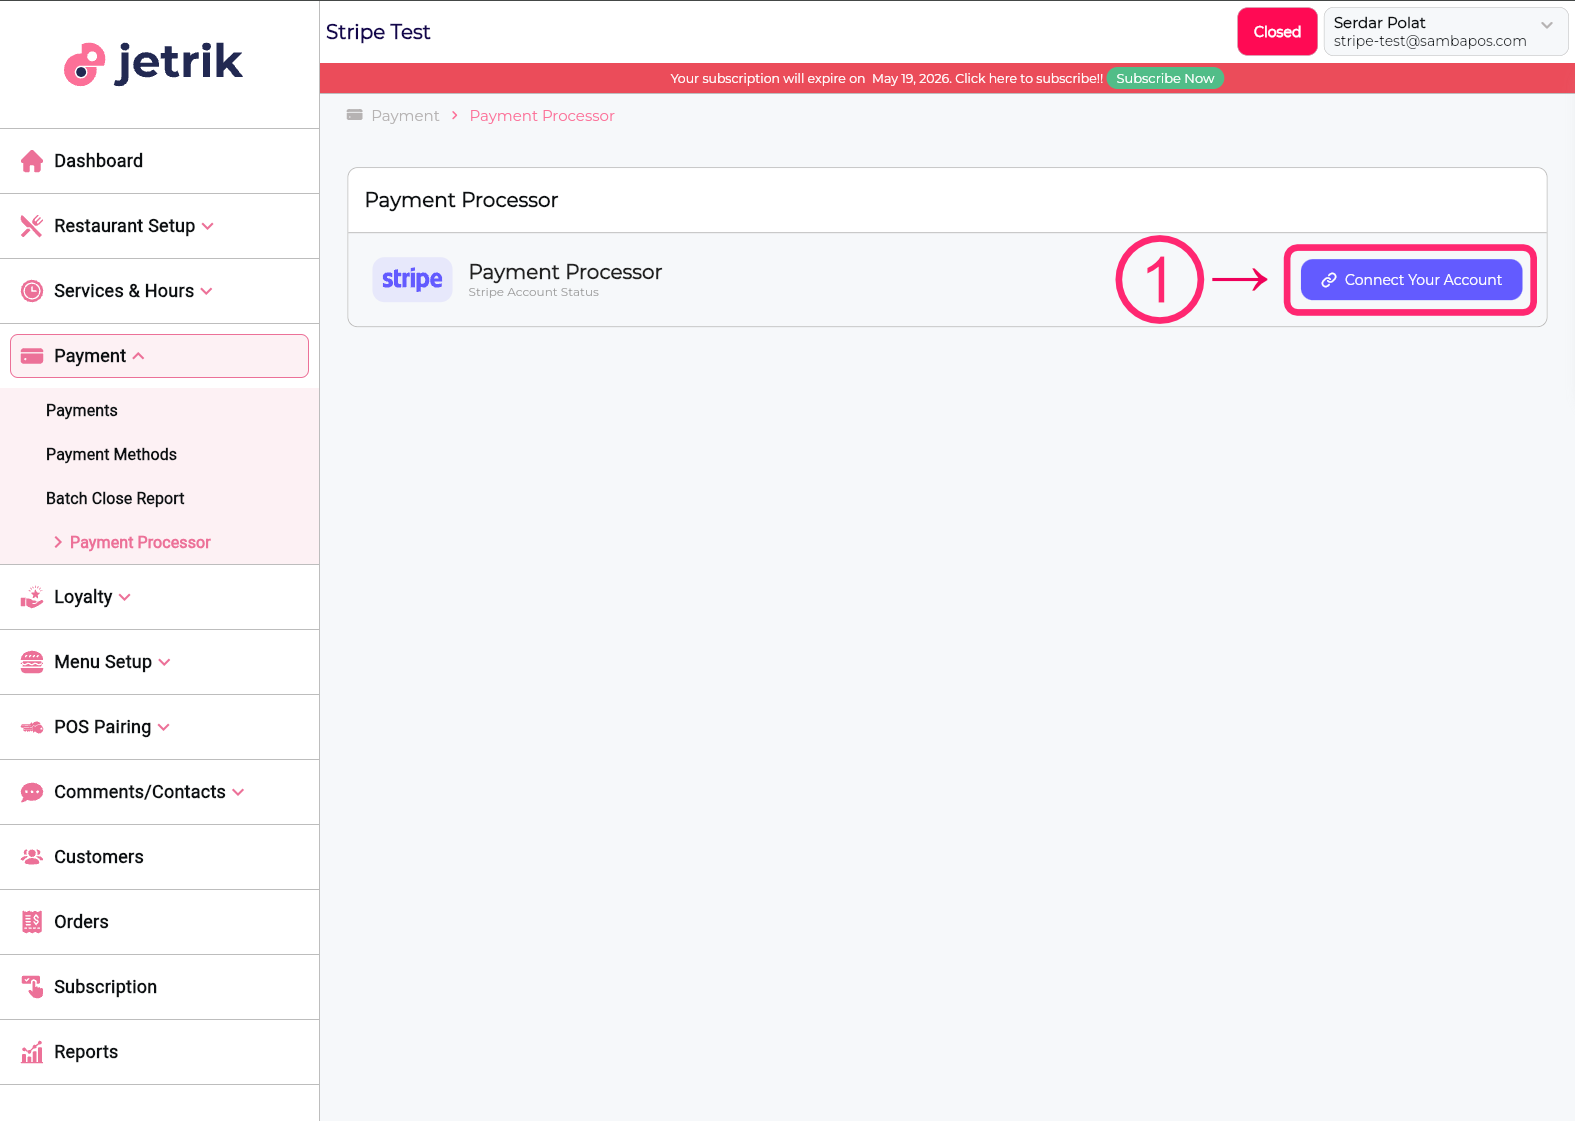
- Navigate to Payment → Payment Processor from the left sidebar. You will see the Stripe Payment Processor panel with a "Connect Your Account" button. Click it to begin the connection process.
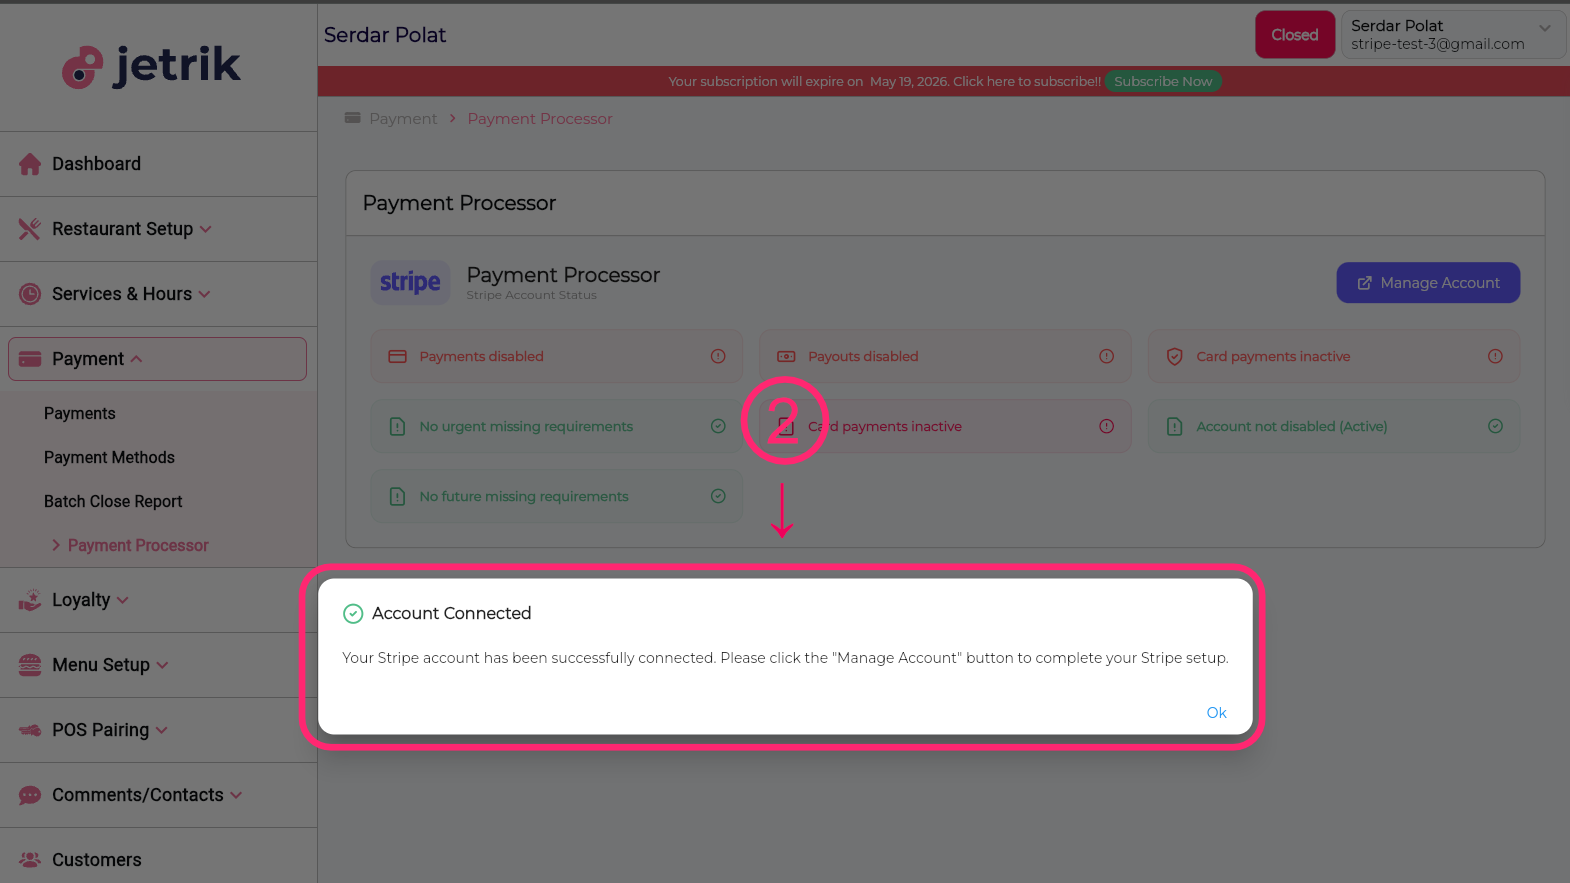
- After completing the Stripe setup, you will be redirected back to Jetrik. A confirmation popup will appear saying "Account Connected." Click Ok to continue. Note that some status cards may still appear red — this is normal at this stage.
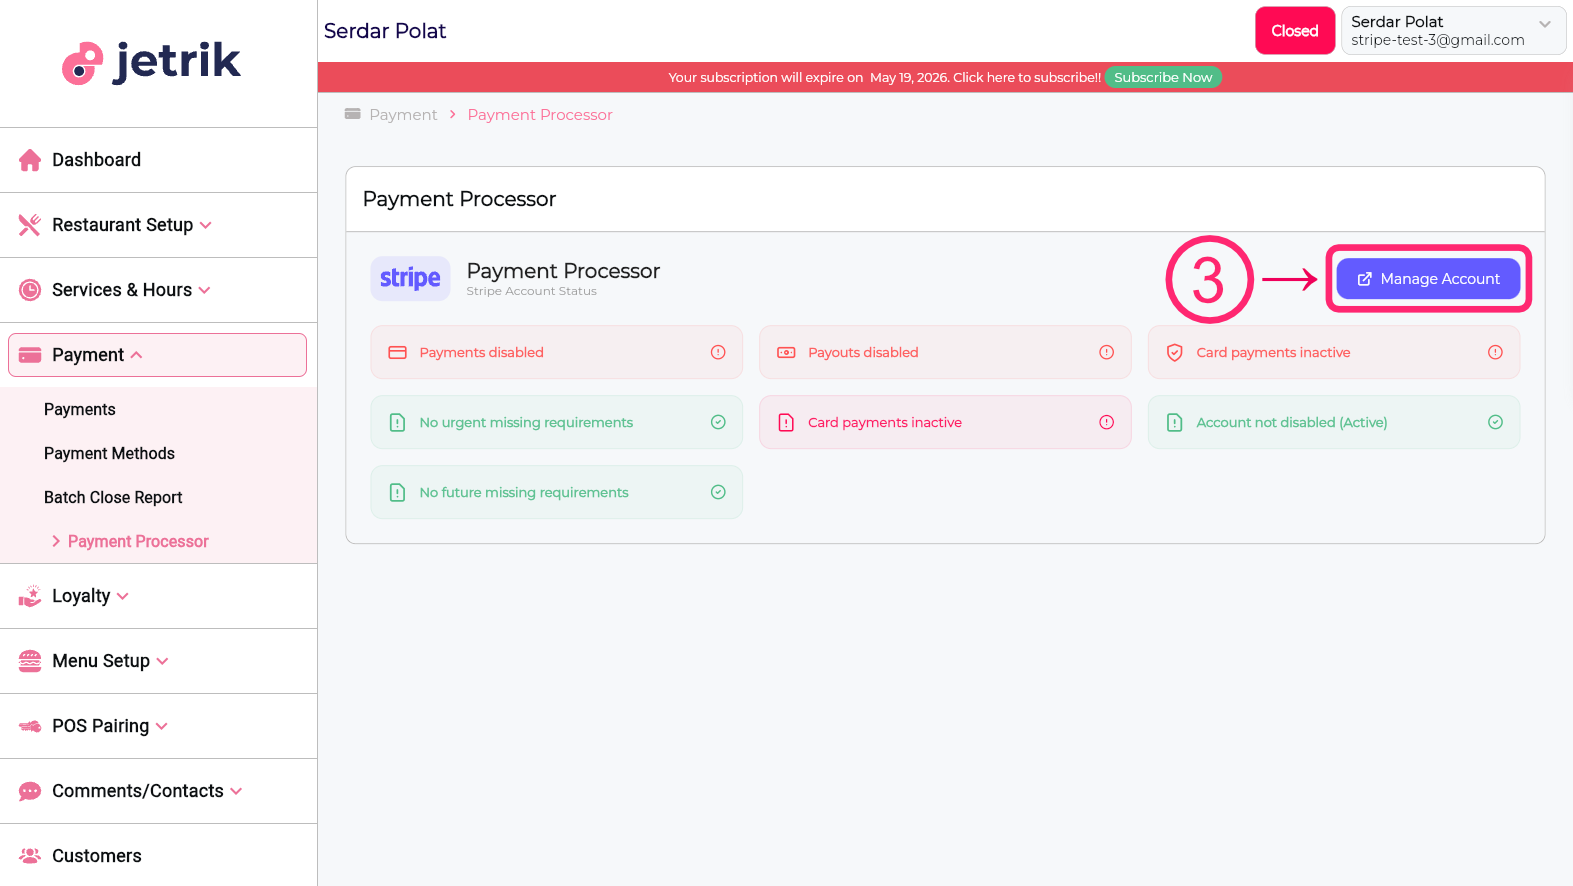
- Once back on the Payment Processor page, you will see the status cards. If any of them are still red or inactive, click the "Manage Account" button in the top right to return to Stripe and complete any missing information.
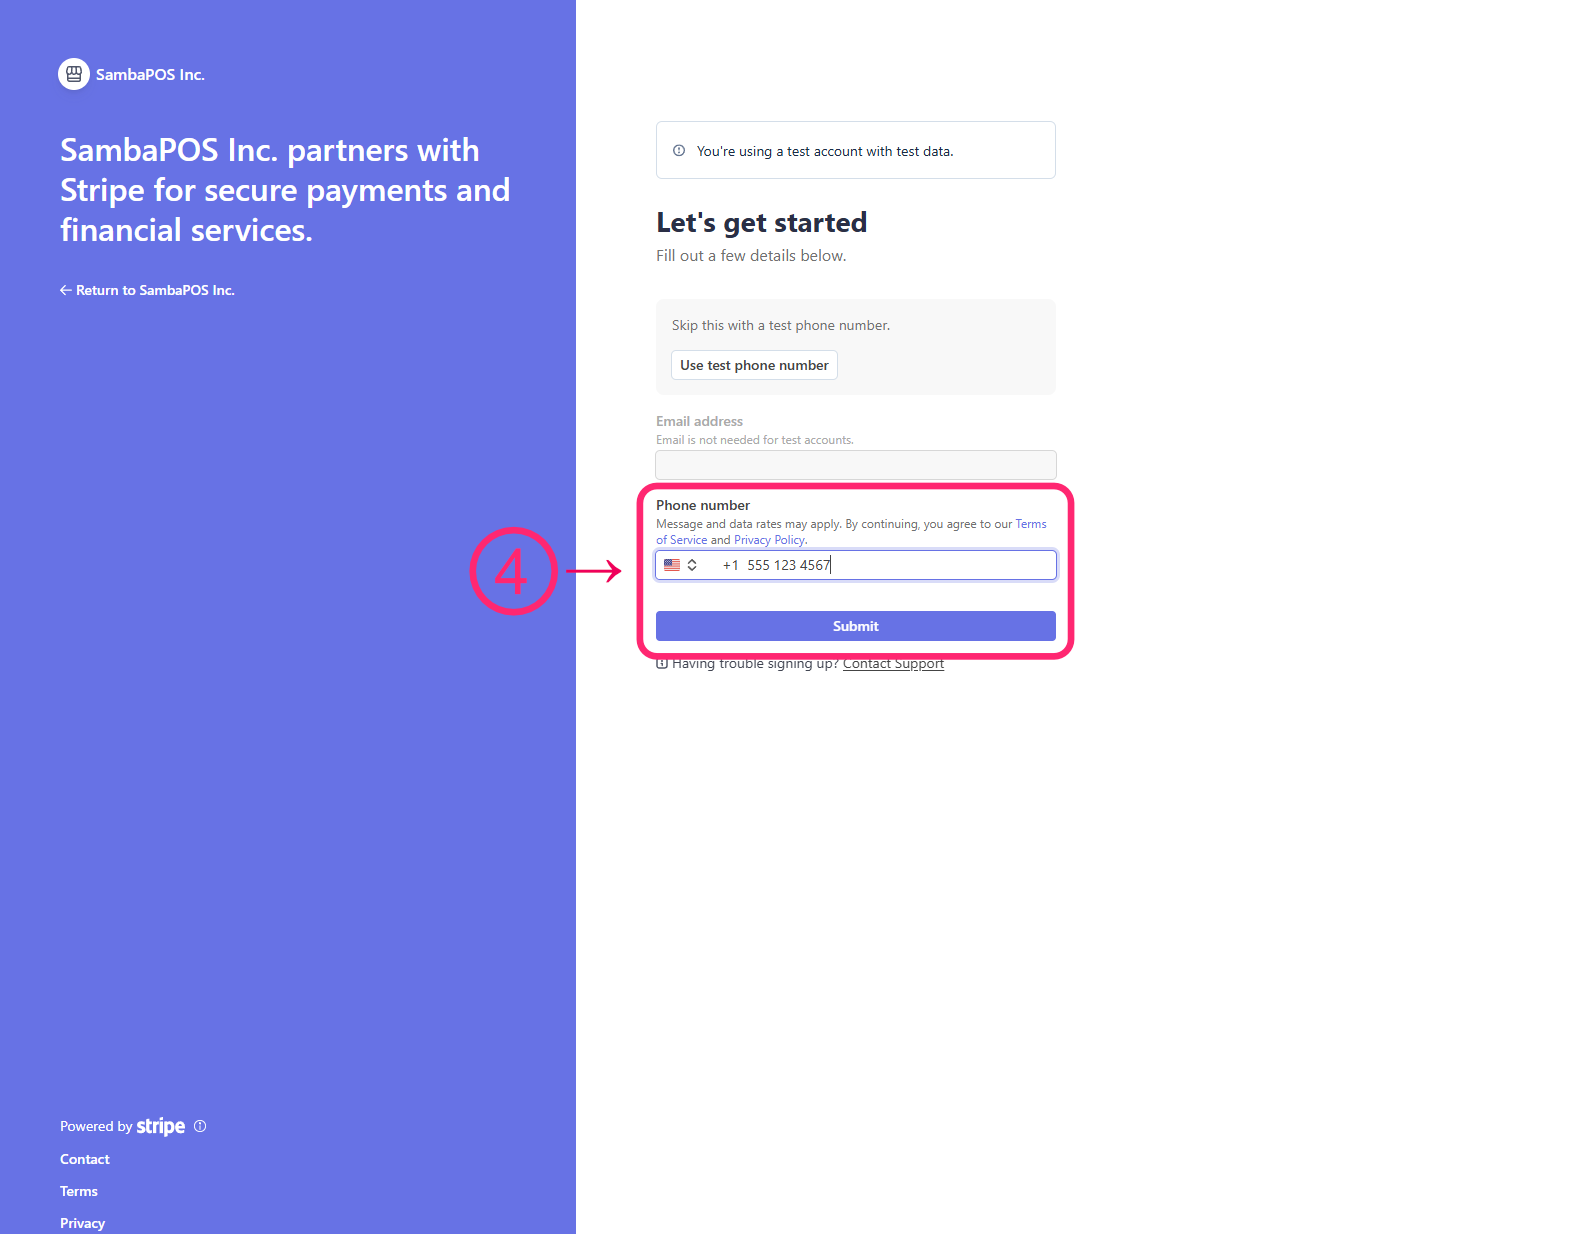
- On the Stripe onboarding page, begin by entering your email address and phone number, then click Submit to proceed.
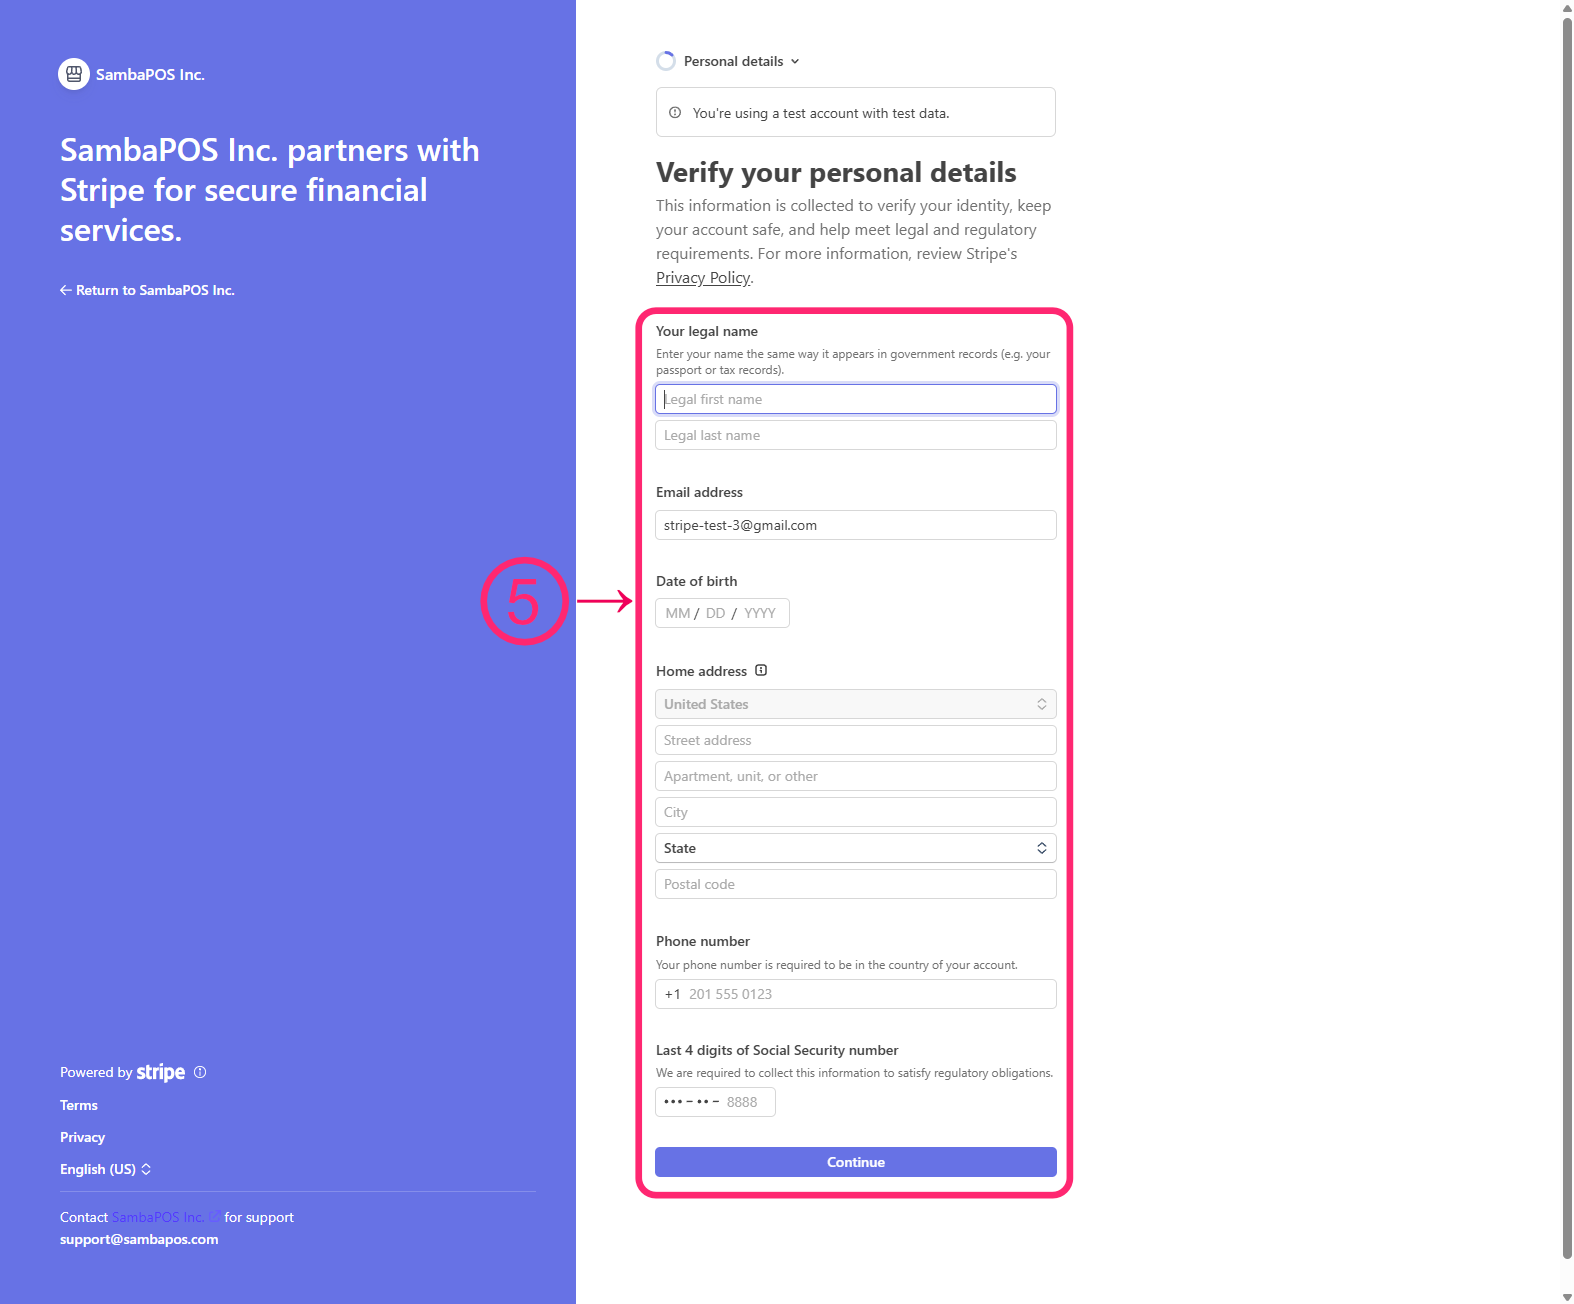
- Next, fill in your personal details — including your legal name, date of birth, home address, phone number, and the last 4 digits of your Social Security number. Click Continue when done.
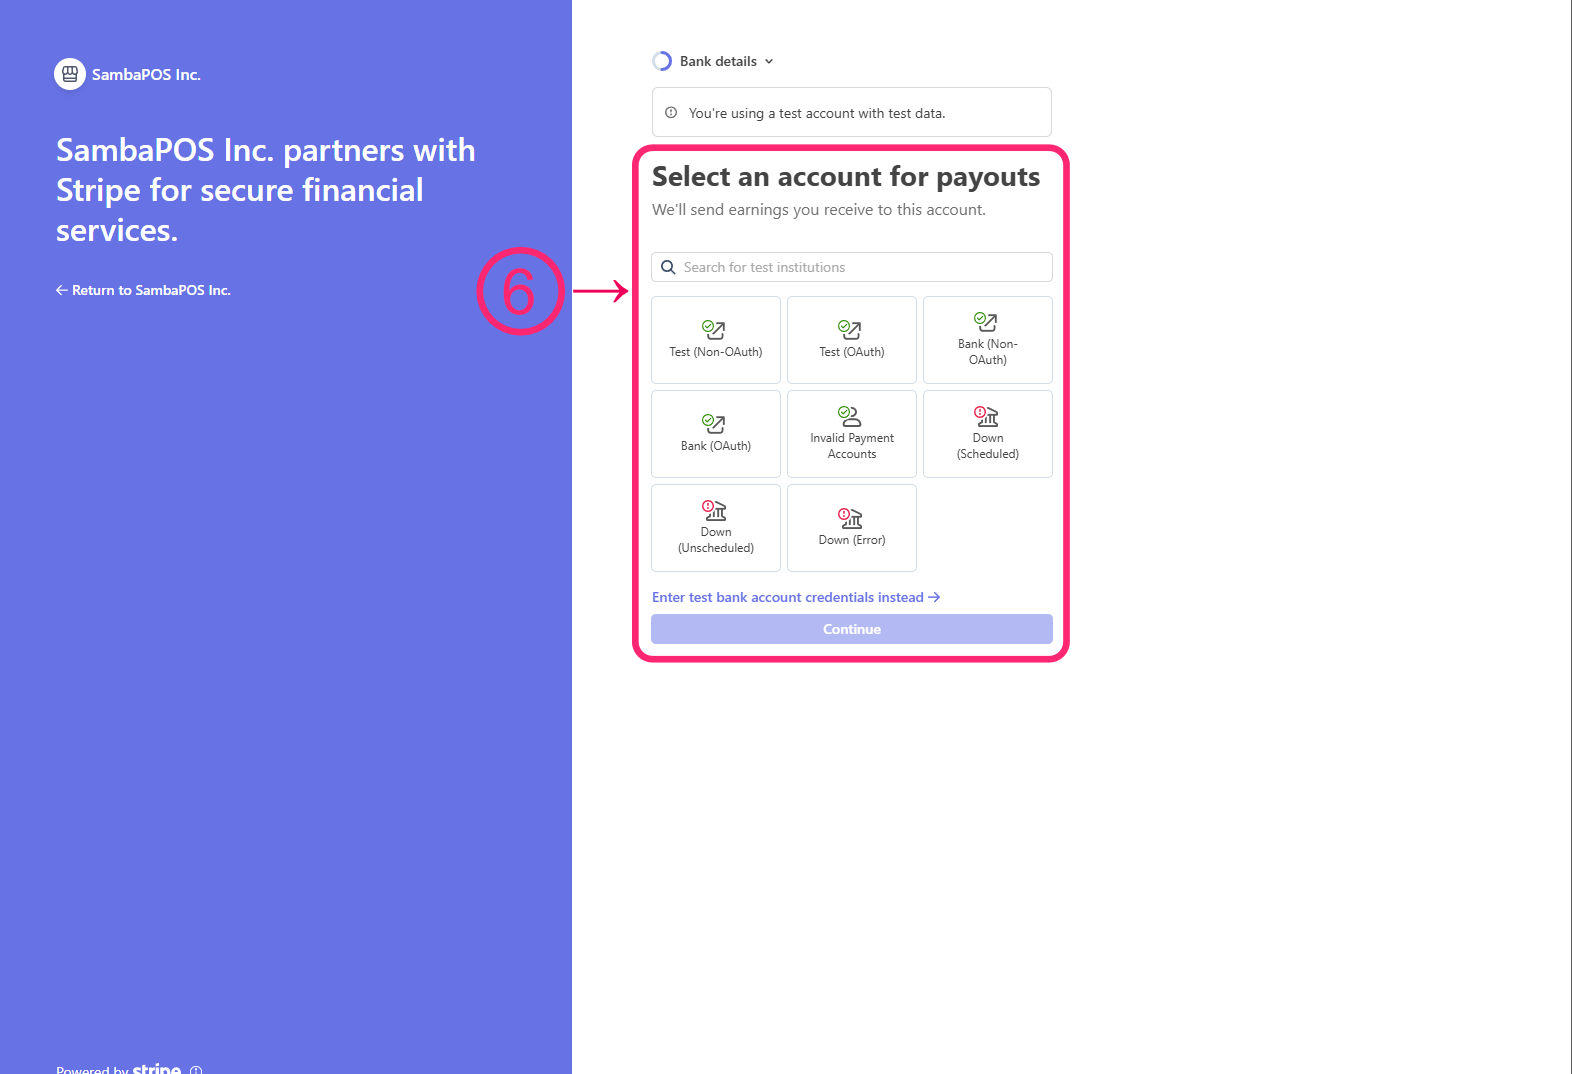
- Select your bank account for payouts. Choose your bank from the list or search for it, then click Continue.
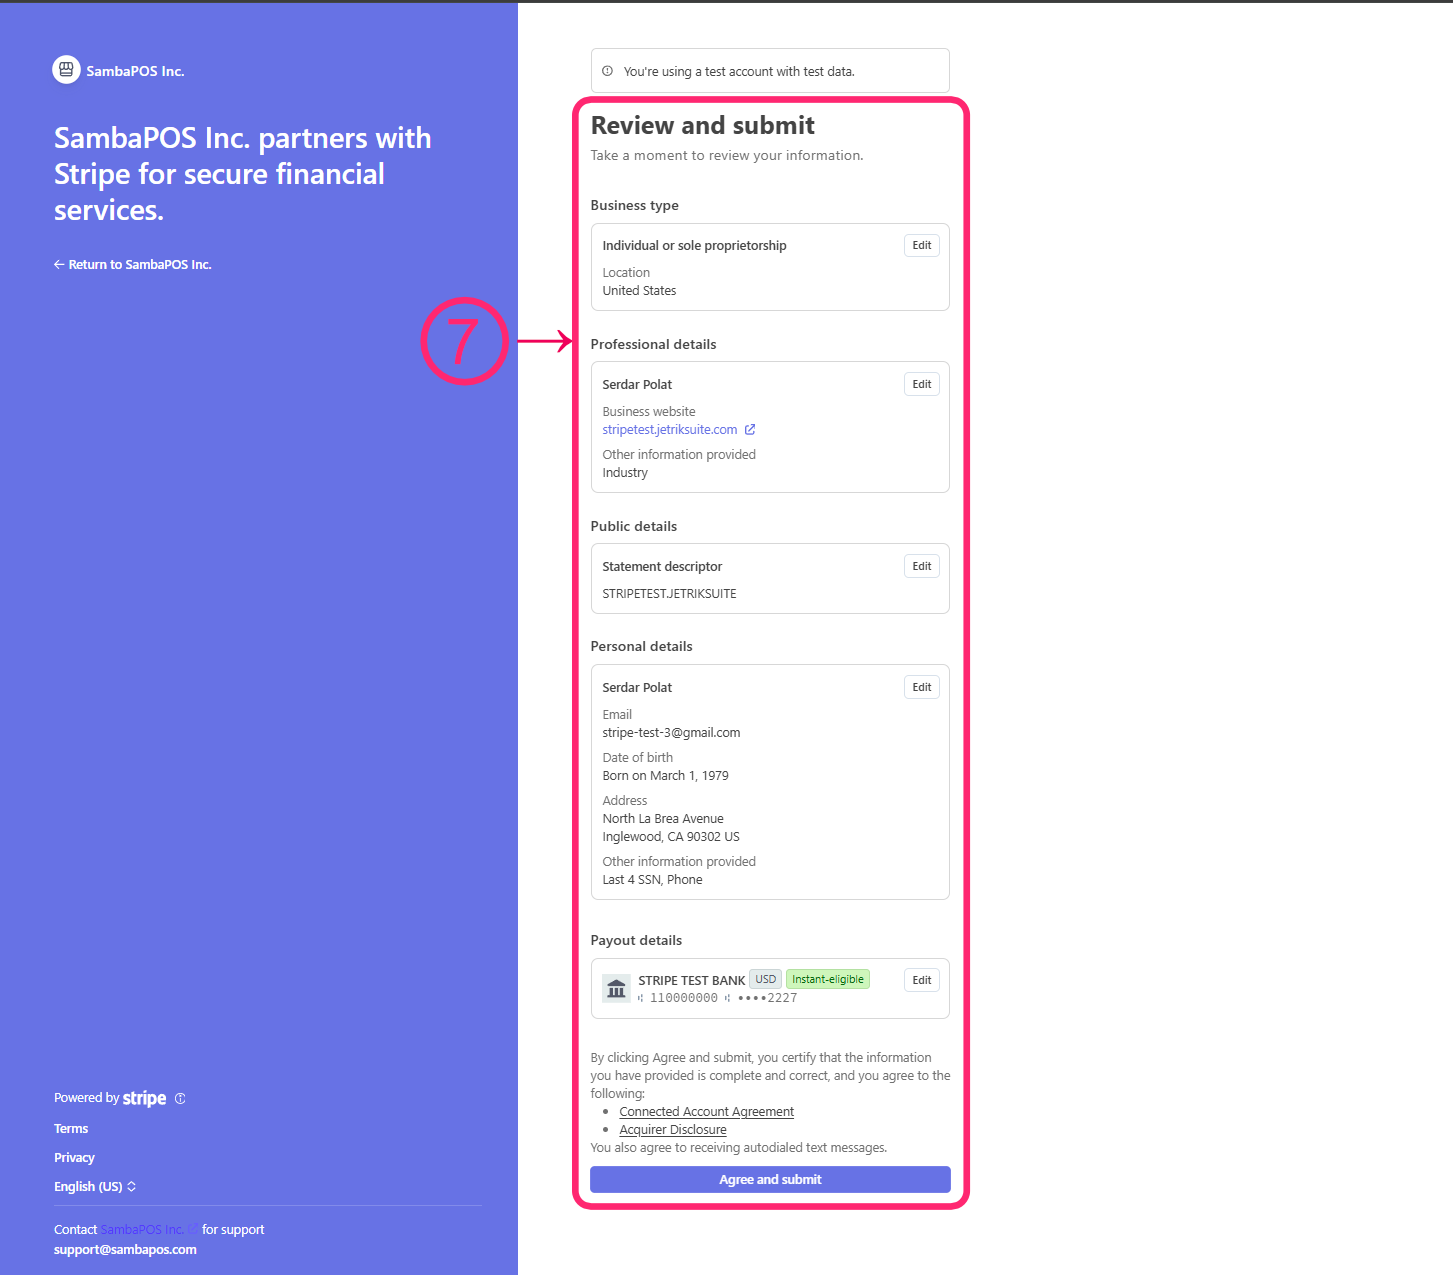
- Review all the information you've entered — business type, professional details, public details, personal details, and payout details. If everything looks correct, click "Agree and Submit."
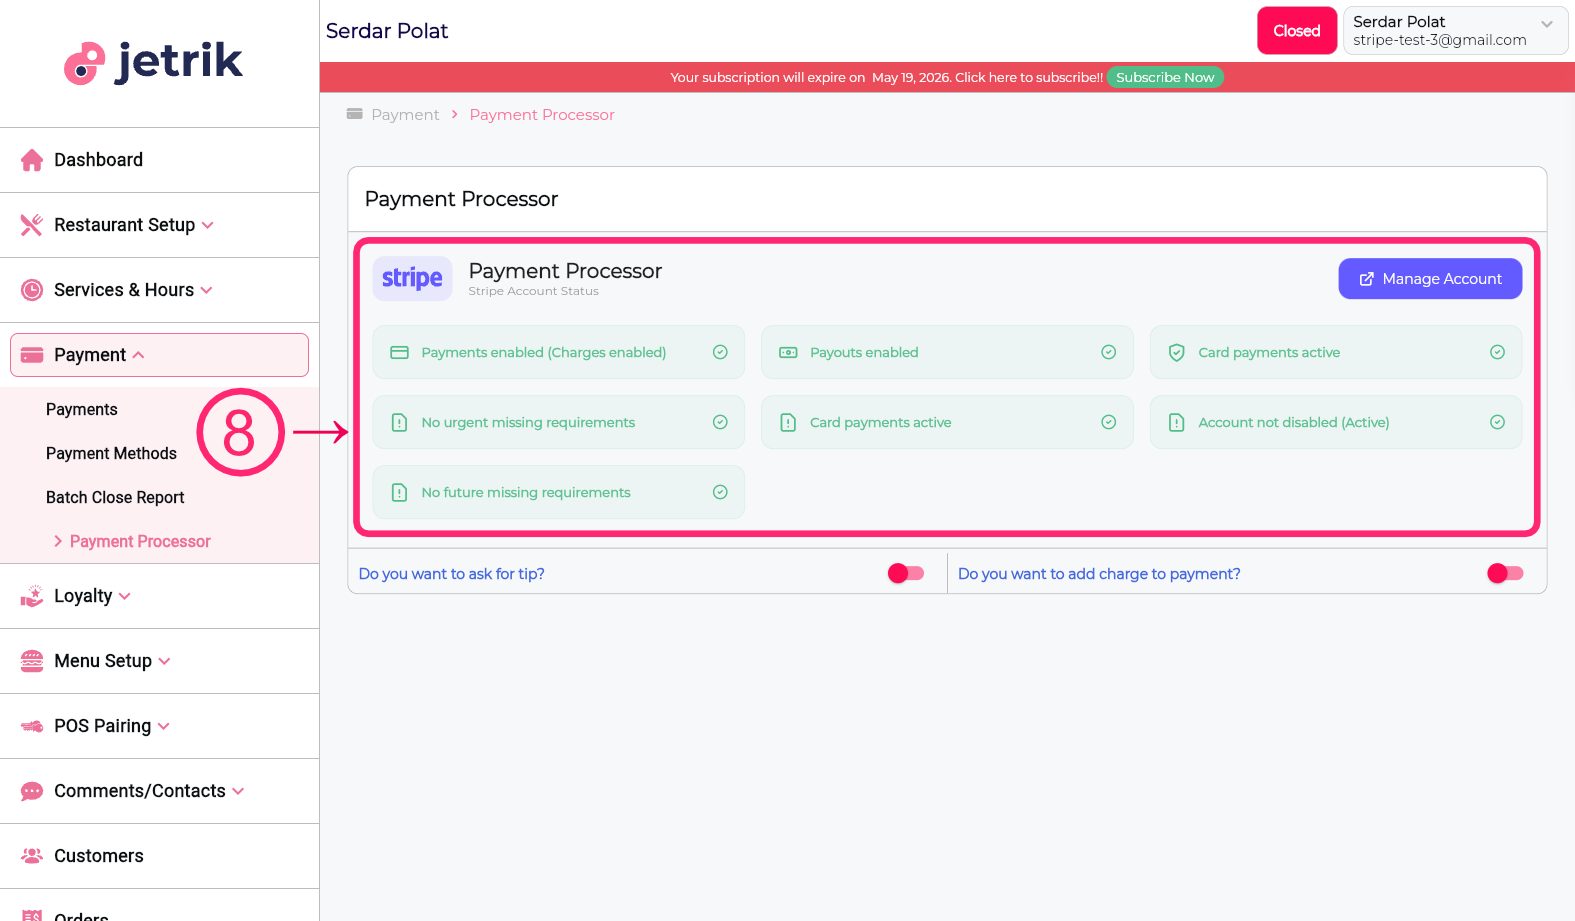
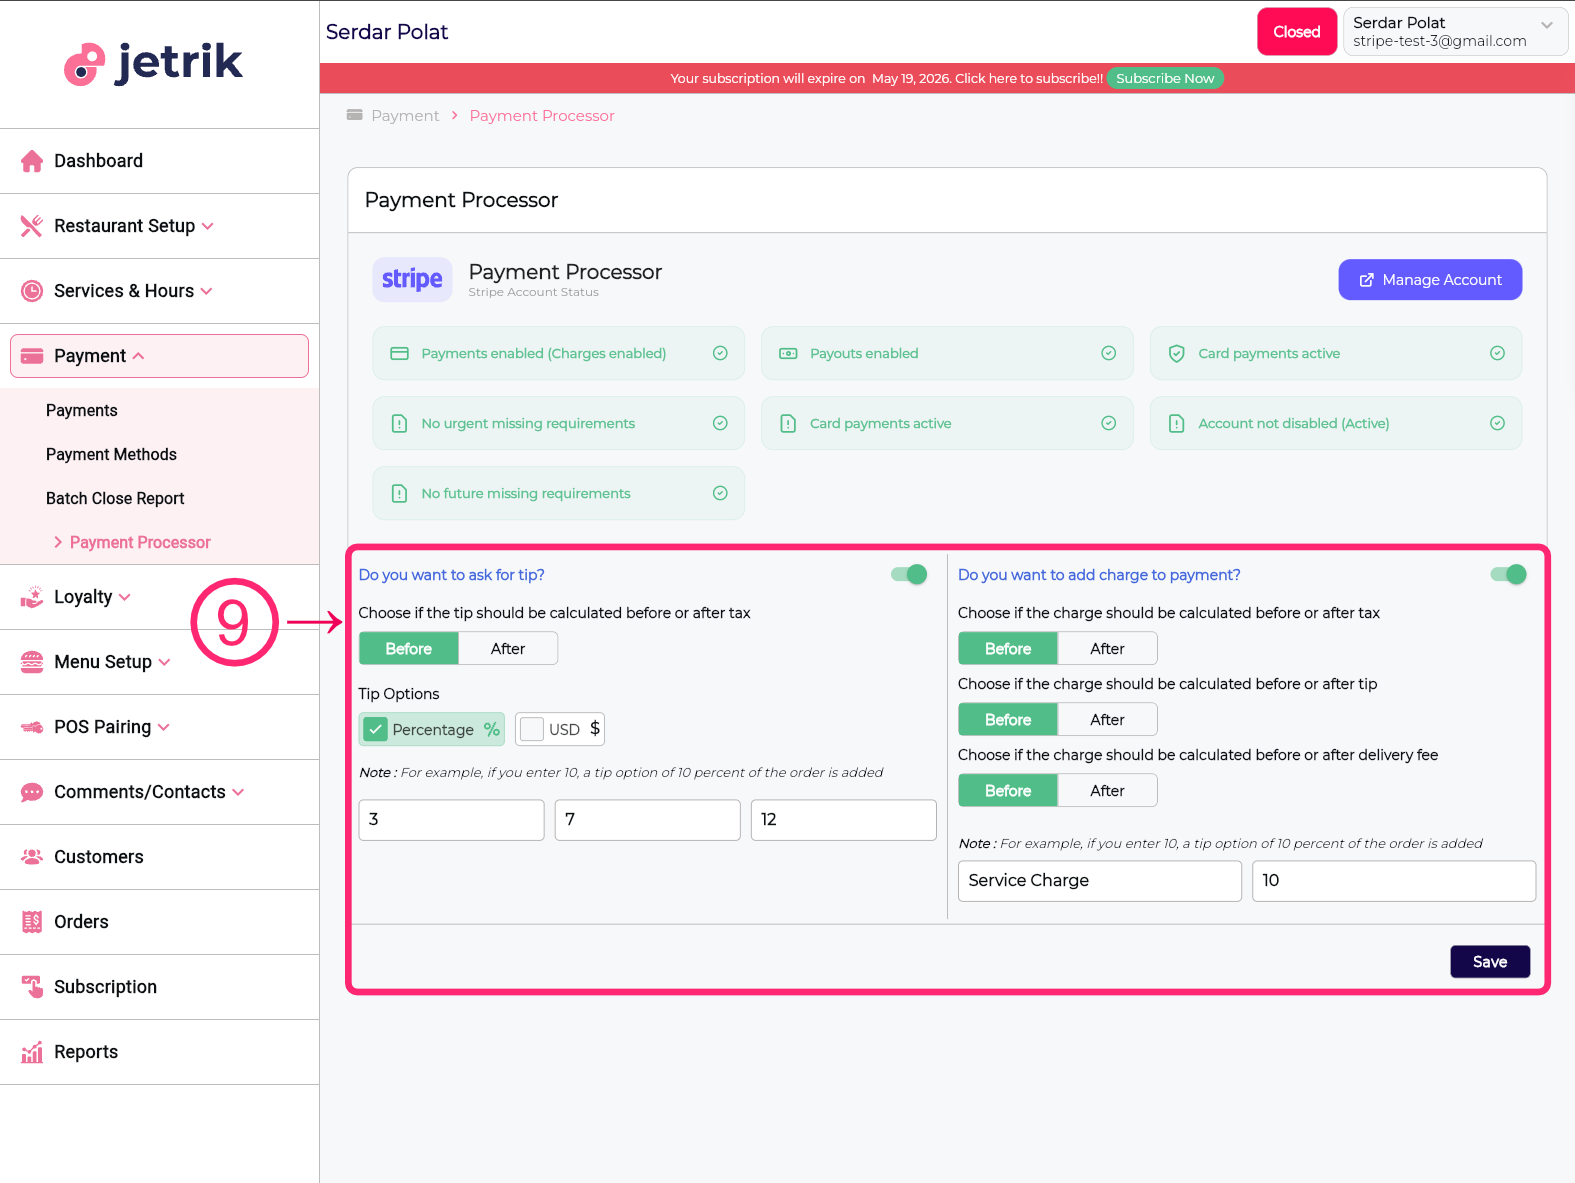
- After submitting, you will be returned to the Jetrik Payment Processor page. Verify that all 7 status cards are green, confirming your Stripe account is fully approved and active.
- Finally, configure your optional Tip and Surcharge settings. Toggle them on if needed, choose your calculation preferences (before/after tax, tip, or delivery fee), enter your tip options and service charge details, then click the Save button in the bottom right corner.